Monday, March 17, 2014

Some Quick Refashions

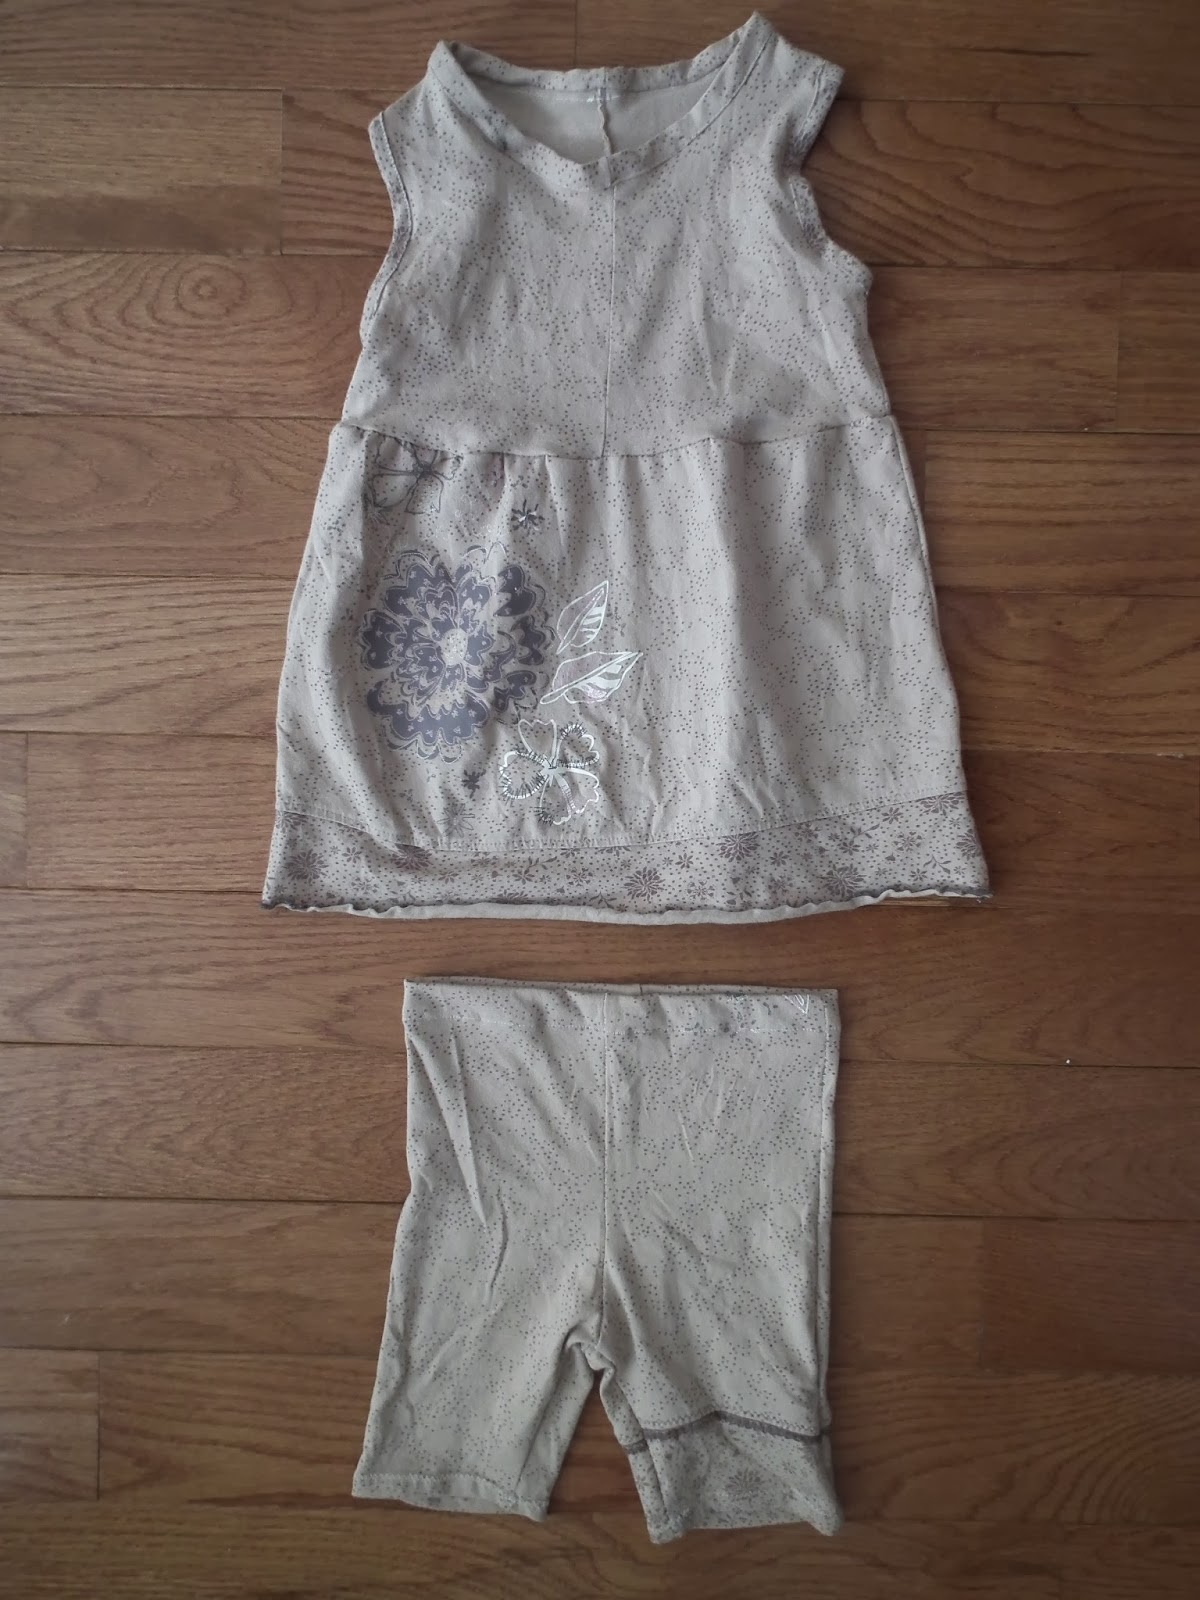
I picked up a few bags of clothing off of Freecycle awhile ago and was able to add about a third of it to my kids refashion pile. (I donated the rest.) Most of it will basically be used as material ie: a pair of adult pants has enough material to fit the pieces of a kids pants pattern on it, so while they'll stay pants their original shape won't matter. These two pieces were close enough to shapes that Sophie could wear that I pretty much just brought them in.

Another "no face" picture


A sweet little summer maxi dress. Even Sophie admitted it was pretty. (She's decided that she will never need new clothes again and is ignoring my attempts to make her next size.)


I didn't take a before picture on this one because it's so similar. I cut off about a third off the side, sewit it back up again, fixed a tear in the lining and made some straps from the cut off bodice pieces. Voila, ladies tank to little girls dress!


These are actually a pair a ladies leggings. They said size small/medium. They were so incredibly stretchy though that all I had to do to make them fit a preschooler was shorten them and take maybe 4 inches off the waist. Not looking so different below eh? Oh wait, there's a seam through the top! Not the same pants after all!


I may have to taper the hem a bit, Sophie hasn't let me try them on her yet. Not bad for an evening's worth of work!

Friday, March 14, 2014

I Was Informed that We Needed Drums...

...and so off to the thrift store we went. Two dollars and the rest of that duct tape later we had these:


Not beautiful but highly entertaining. The duct tape is the perfect top; loud enough to satisfy the little ones but not so loud that this toy disappeared during nap time ;) Sophie had very definite ideas about what could be used as drumsticks. I think we went through every random utensil they had until something satisfied the both of us. (Not sharp or flimsy for me, not resembling any other object for her.)


Deacon approved. My In-laws call him Bam-Bam for s reason! Noise AND sticks, his idea of perfect. --

Wednesday, March 12, 2014

Baby Wipes

WooHoo! Another baby project post <3 aren't you excited?

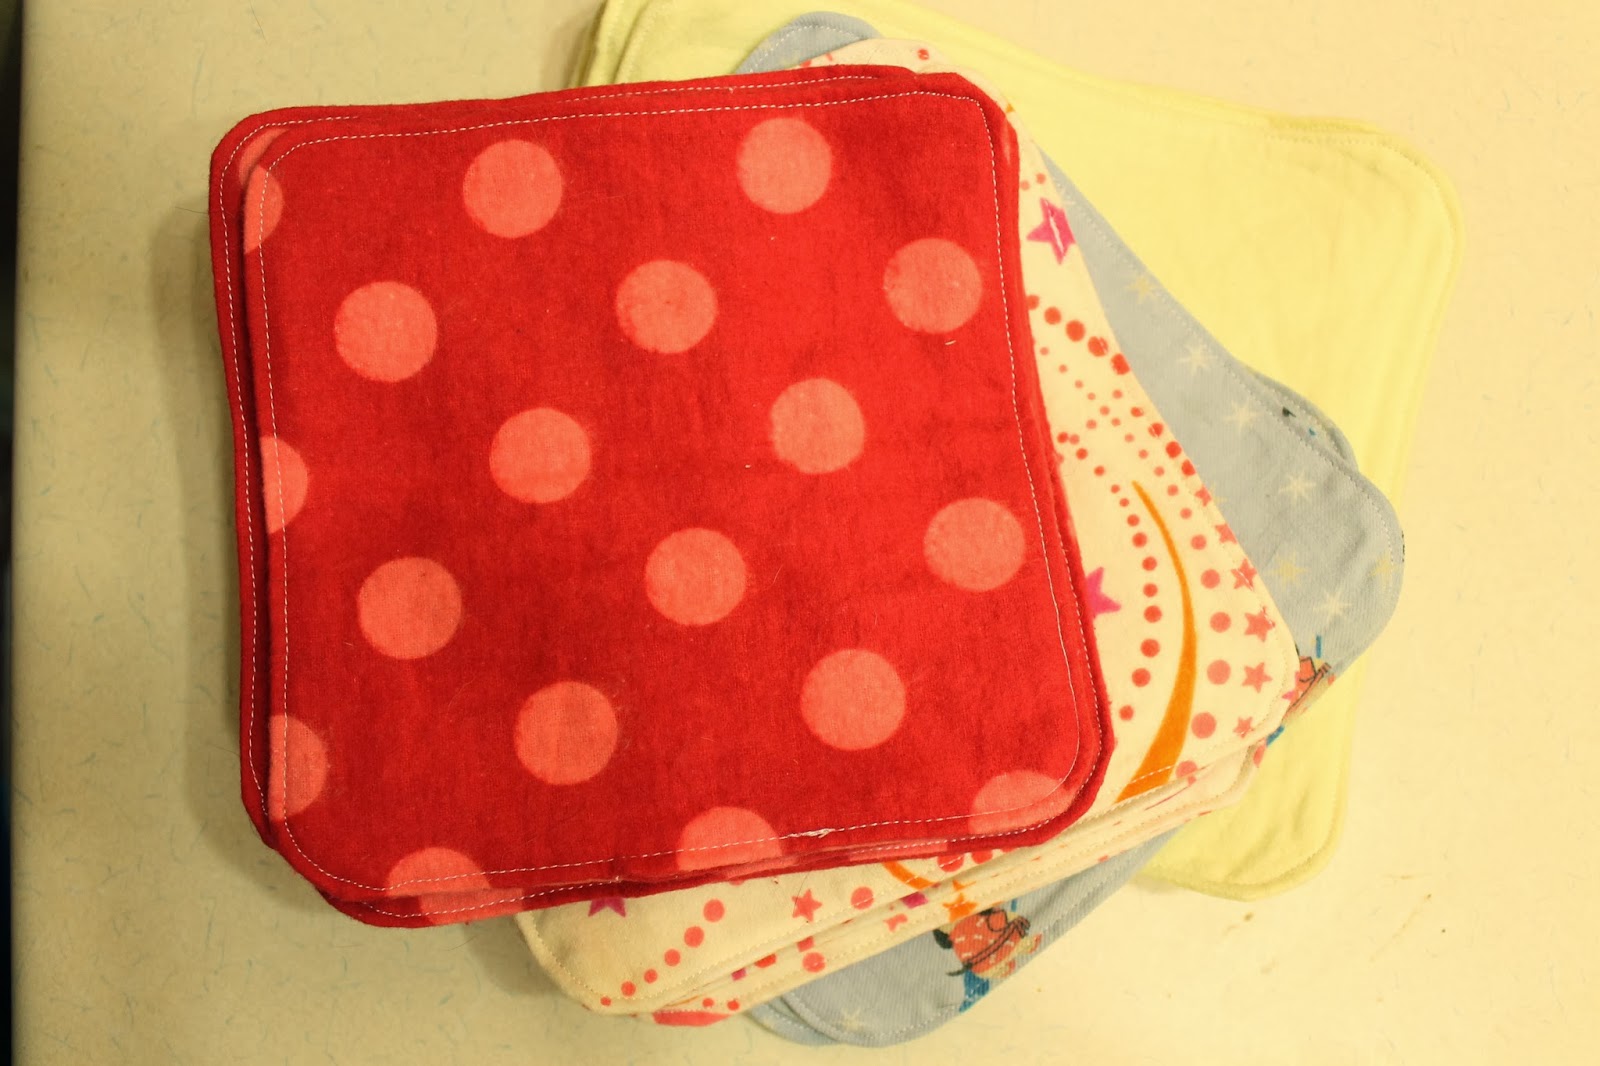
While diapering my first two children, I used cheap Walmart baby wipes. They've been used not only for bums, but for everything from washing the giant chalkboard in our living room, to dirty hand prints on the walls. It was time to retire them. I searched through my fabric stash and came up with two pieces of flannelette big enough to use, as well as an old pair of pajamas that I've had since about the age of 13, that finally kicked the bucket. They glow in the dark. The yellow flannelette was donated by a friend.

Basically, I just folded the fabric until i found a size that would make the most use out of what I had. They're all roughly between 8-9 inches. Once cut, I put two pieces together, with the right sides facing each other. I sewed them together using about a 1/4 inch seam allowance, rounding the corners as I went, and leaving a small hole to turn them right side out. After trimming the corners and turning them right side out, I simply top stitched them. Nice and easy. Now I have 38 new soft, double layered baby wipes. Cost- 0$

Monday, March 10, 2014

The No-Seam Allowances Pajamas

AKA Good Thing My Kid's a String Bean 


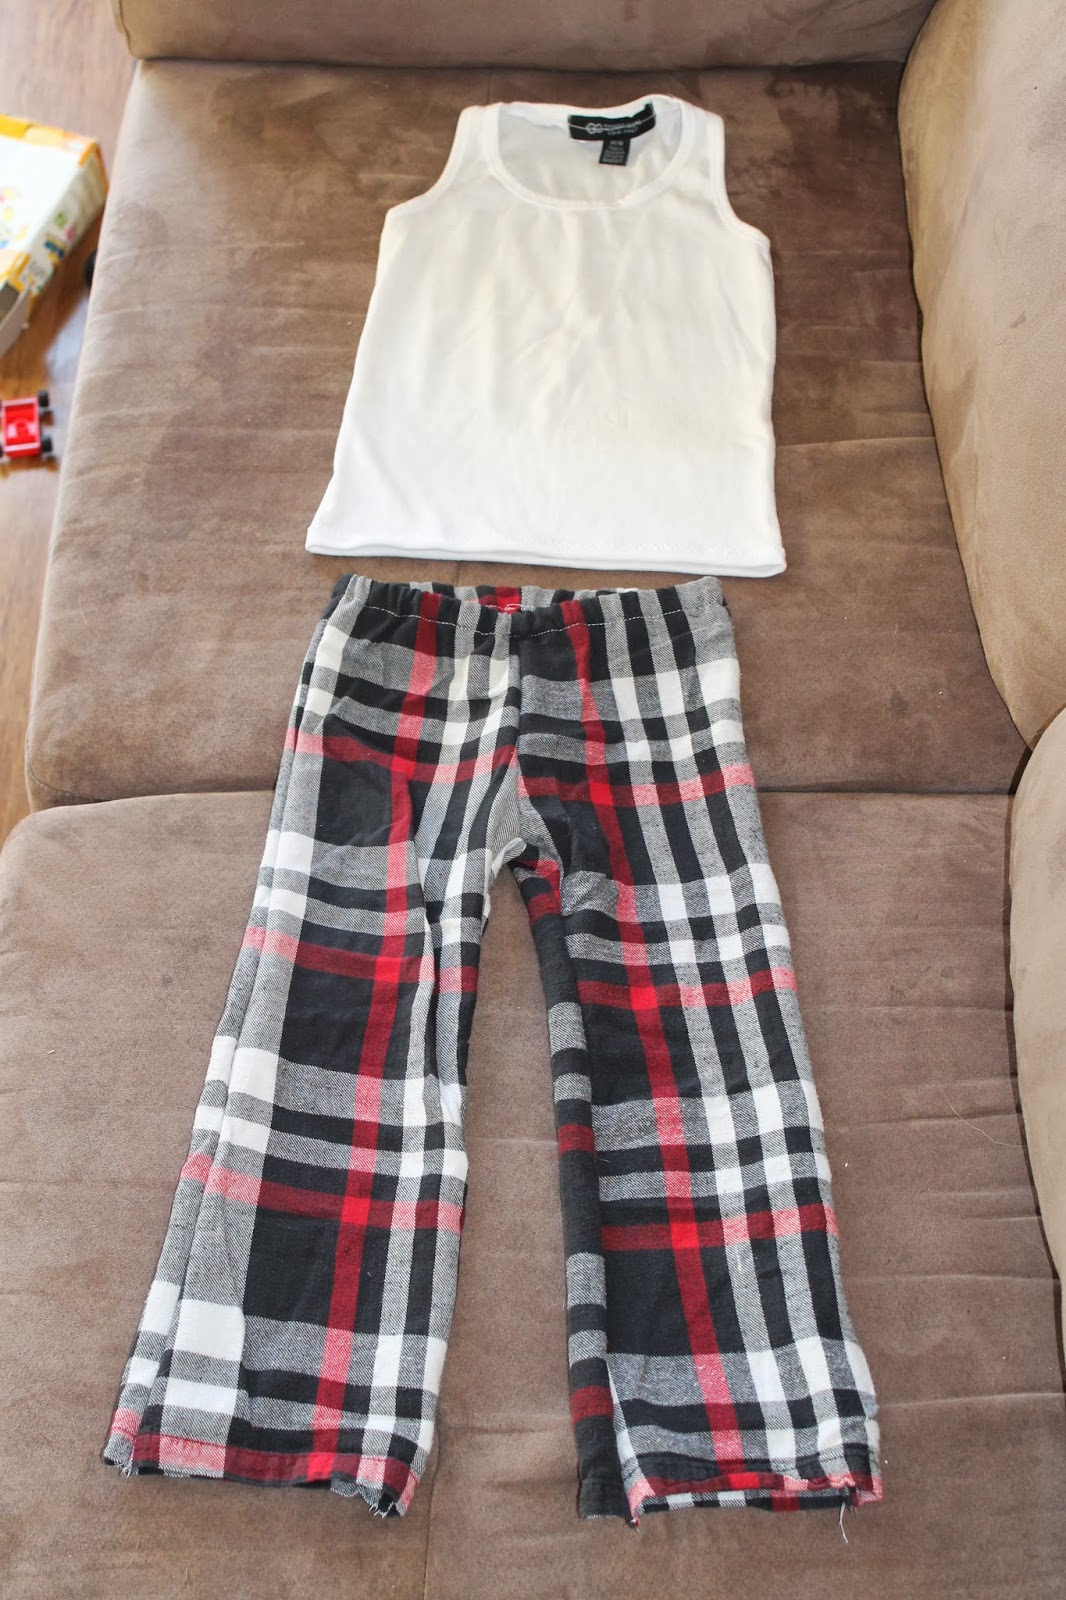
Sorry it's an ebay listing, the only place I could find it was the seller I bought it from. (They're excellent by the way if that's your thing.) The book is called Handmade for Children and if you scroll down the ebay listing you can even see the pictures of this pattern from the book. If you've used a Japanese pattern book before you know that they don't include seam allowances, you add them as you trace the pattern. Unless you're on a roll cutting out pattern pieces for your next few projects and forget that the middle one is a different type of pattern... (wait, you don't do that? You finish one project before starting another? Has anyone suspected you of being an alien before?)

She agreed to pose for the picture as long as her face wasn't in it.

I realized my mistake before sewing so I stitched as close to the edges as I could. The only thing that was really a problem was that the binding for the neck and arms weren't pattern pieces, they were "measure a rectangle this many centimeters" and I didn't clue in that this would make them too big. You can see in the picture above that they don't lie flat. 

Know what else I forgot? To iron the shorts before showing the entire internet!

Sophie's thin enough that she can still wear the shorts. The bright side is I was saved from needing elastic in the waistband! The little lace cuff on one leg is because I used an old nightie of mine to make these. If I wanted to keep the original hem and flowers for the bottom of the shirt I had to get creative on where the other pattern pieces went! If you look closely you'll also notice that there's a seam through the middle of the bodice since I couldn't put it on a fold. 


Over all I'm really happy with these. I'm kind of hoping the binding evens out a bit in the wash but if not, they're just pajamas. Don't make the mistake of calling them pj's though. Sophie will correct you quite sternly ;)

Friday, March 7, 2014

Sensory Bucket

I originally set this up to use on our balcony with moon sand (google the recipe if you have littles, you won't regret it!).  It's just two dollar store buckets, one deep and a shallow one that fit in the top. I put in a tiny tea set, kids rake and shovel, a mini flour scoop and a sand castle mold. I just had all of these on hand, you can use anything really.  I've been trying to set up things for Sophie during Deacon's naps that she can't normally do because he's around. I've seen people put things like corn and rice in these so I figured beans were just as good and that's what we happened to have already.


She played with it three days running and was surprisingly good about picking up the beans she dropped. She played tea and bean store, then tried to build a bean castle. Then the animals joined the fun. What should we put in next?  I'm thinking tinfoil a la  Paint On The Ceiling:

What would you put in?

Monday, March 3, 2014

Diaper Elastics

Hello blog land, it's been over a year since I've posted on here. If you've been reading this, you'll know that my sister and I will now be using this blog for everything from activities with the kids, to sewing projects. We are currently expecting baby number three, who is due to arrive in a matter of weeks. I had been meaning to start posting again at the beginning of February, but have been busy getting ready for the baby. For my first post, I'll just be showing you one of my baby sewing projects.


Before Katie was born, we invested in 12 GroBaby diaper covers. After being used with two kids and stored in a cold basement, the elastics were shot. Instead of replacing the elastics, I bought 8 new GroVia covers. My second child, DJ, has been potty trained for a little while now, and having the new covers in cold storage has already started to wear out my elastics. We're trying our best to use what we have and save money, so instead of buying new ones again, I replaced the elastics on my original 12 diaper covers, and once the new ones need to be replaced, I'll do the same to them.


A few diapers with new elastics, unfortunately I didn't think about taking before pictures. 

The old elastics, they smelled like burnt rubber and you could hear them cracking and breaking as I stretched them.


Button Birthday Dress

So we were invited to a party and told that the birthday girl loved frilly dresses. It was almost like they were asking me to make something (in my own mind lol).  And so, this is what I came up with:


Wait, what?!? Pajama pants, scrubs and stained shirts? Really? What can I say, Sophie's been into darker colours lately and most of my stash is actually adult clothing rescued from the donation bag. I'd have preferred to buy new fabric since this was a gift but that wasn't in that weeks budget. Don't worry though, it all worked out for the best. See?


Cheerful ruffles galore!

Doesn't that just make you happy? Or am I just getting antsy for spring over here?

It's kind of a franken-dress pattern wise. I started with a basic A-line dress pattern I had out from another project. I used it to reference the length and for part of the bodice pattern but since I was making that out of the top of an existing shirt I ended up modifying it.  The underskirt is a different tank top that I added to the plan later. The hearts shirt had stains along the lower part that I hoped the ruffles would cover. When I was placing them I realized they wouldn't be completely hidden. Realistically the only person who would ever notice would be whoever does her laundry but I figured a gift deserved higher standards than a refashion for my own kids so we went like this:


I'll also admit that the row of buttons is covering the fact that the top seam didn't want to line up quite as tidily as I'd have liked. The whole mixing fabric types thing. (The dress is jersey and the ruffles are cotton.)


I attached the ruffles using the method from this pattern: http://www.etsy.com/listing/82318775/ruffle-dress-pdf-pattern?ref=shop_home_feat (Sew Fab Pattern Bundle strikes again!) The actual pattern instructions use an existing t-shirt or onesie so if you like the look but don't want to be drafting a top you can do it much more easily that I did. I'm not looking to complicate my life I swear, it was just a use-what-you've-got project and a brand new size 5 t-shirt didn't happen to be waiting for me in my refashion pile ;)

P.S. Did you notice that I used my brilliant computer skills to figure out how to post as myself? I know, it's like I'm a rocket scientist or something. Now I can stop impersonating my sister. Unless you were planning on sending her cupcakes.